Overview
In this article, we will introduce how to use the debug camera in Unreal Engine. During game development, characters may fall out of the field or inside meshes, but with the debug camera, you can quickly move to a safe location or warp to a specific position.
We will also explain how to visually check the collisions affecting the player using the Show CollisionPawn and Show Collision commands.
This will make the debugging process more efficient and help streamline game development.
References
- Video: Advanced Debugging in Unreal Engine
- Information about the Debug Camera is explained between 7:48 - 11:08.
- Using the Debug Camera in UE4 (ToggleDebugCamera)
Environment
- Unreal Engine 5.4
Main Content
During game development testing, it's often frustrating when the character falls out of the field or inside environment meshes due to collision issues, interrupting the test work. In such cases, using the debug camera allows you to return to a safe place or warp to the desired location.
First, run the game.
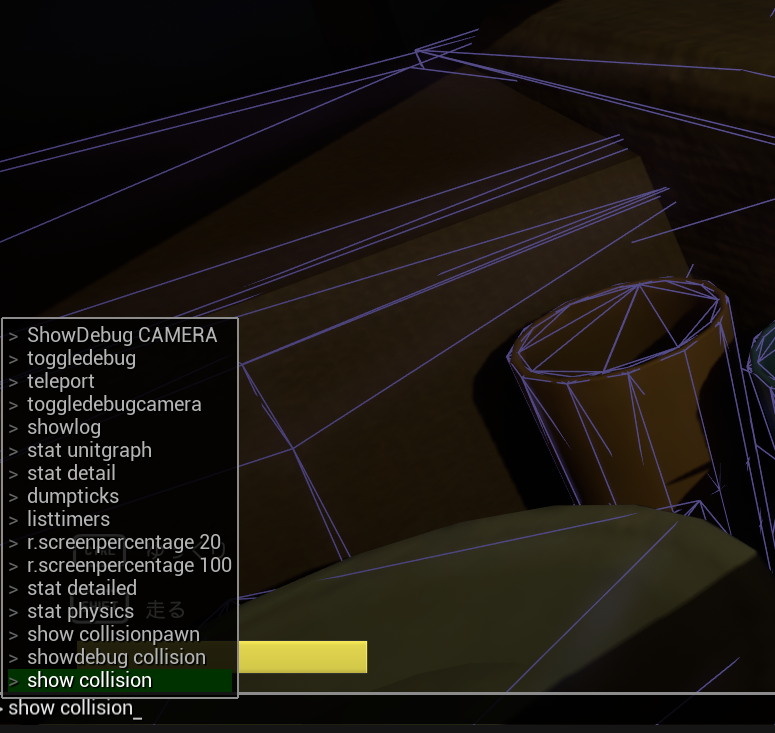
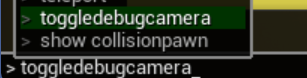
Next, enter the ToggleDebugCamera command, or press the semicolon ; on an American keyboard.
The camera will switch to the debug camera (free camera).
Additionally, information such as the camera's coordinates will be displayed on the screen.
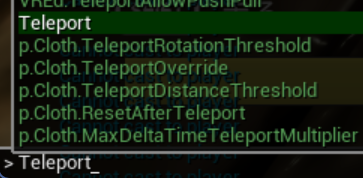
Move freely with the WASD keys, and by entering the Teleport command, you can warp to the location indicated by the white line in the center.
Entering the ToggleDebugCamera command again will return you to the original player control.
You can confirm this behavior in the video.
デバックカメラ(ToggleDebugCamera)で安全な場所に移動する(Teleport)方法#UE #UE5Study pic.twitter.com/0LclHVYPJL
— Key🎸🎮 (@kiikey4) October 20, 2024
By using this method, you can save time resuming testing, making it more efficient.
By the way, if you want to debug collision issues, you can use the Show CollisionPawn or Show Collision commands to display collisions affecting the player.

As you can see, the collision display is confirmed.